Invite and manage people
Invite by email or CSV, set roles, allowances with pro-rata start dates and per-type counters — and handle departures the right way.
Settings → Team is where people enter, get configured and — eventually — leave. Everything about a person is in one modal, organized in three tabs: Profile, Contact and Absences.
Invite people
One at a time
Click Invite someone: name, email, role, department, allowance and start date. They receive an email with a link to set their password and land straight in your organization. Until they accept, they show an Invited badge — open their modal to copy the invitation link (hand it over on Slack if the email got lost) or resend it. Invitation links are single-use.
The whole team from a CSV
The Import from CSV box takes a file with one row per person — download the sample to start. Columns: email (required), first_name, last_name, role (employee/manager/admin), department (created if new), annual_allowance, start_date (YYYY-MM-DD), country, locale, plus the optional HR record (phone, address, emergency_contact_name, emergency_contact_phone, payroll_reference) and working_days (1=Mon…7=Sun, e.g. 1;2;3 — empty means the company week). Every valid row gets an invitation email; problems are reported row by row.
Coming from Timetastic?
The same card has a Migrate from Timetastic button: upload the Full Export and the whole team, its history and its balances come over in one go. Step by step in the migration guide.
The three roles
| Role | Can do |
|---|---|
| Employee | Books leave, sees the wall chart and their own allowance |
| Manager | Everything above + approves requests for departments they're the approver of, and can lock dates there |
| Admin | Everything + all settings, all approvals, billing and GDPR tools |
Edit a person
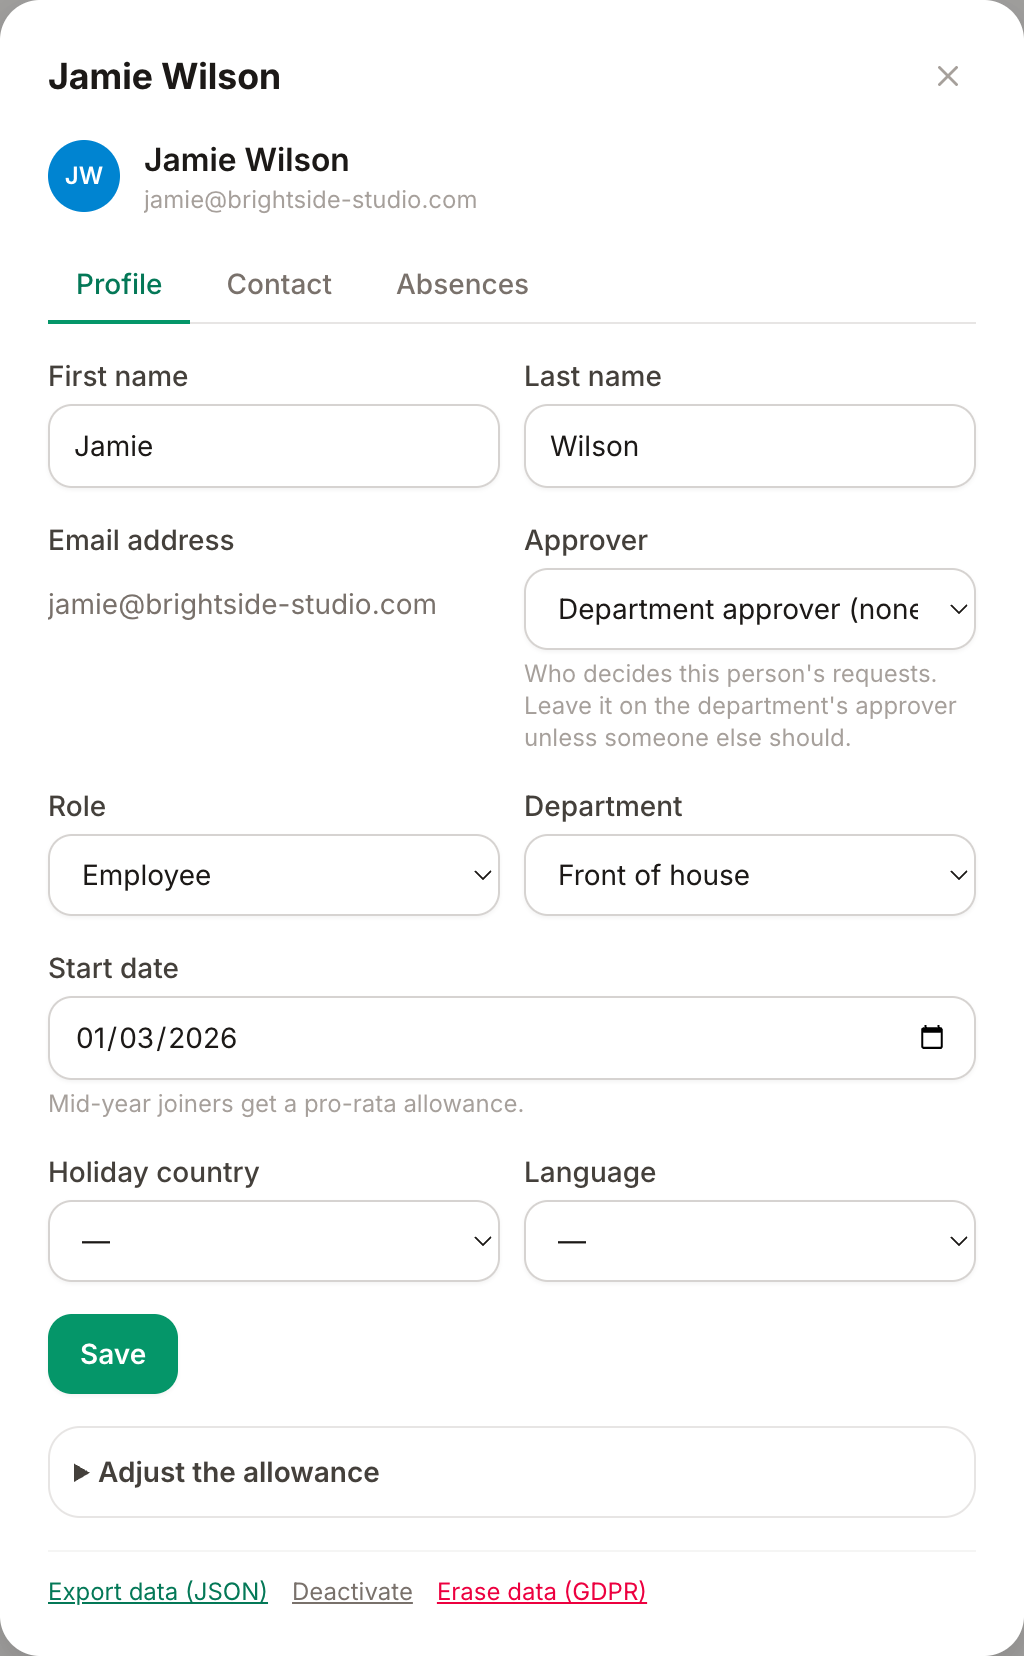
The People table shows six people at a time: search by name or email, filter by department or role, and move between pages with the small pager under the list. Click Edit on anyone in it. The modal has three tabs — a single Save covers them all.
Profile
- Name — plus the account email, shown for reference (people change their own email from My Profile → Security).
- Approver: who decides this person's requests. By default it's their department's approver (or all admins when the department has none); pick a specific manager or admin here when someone else should decide for this person, whatever their department. The dropdown always shows who they'd inherit.
- Role and department.
- Start date — mid-year joiners automatically get a pro-rata allowance in their first year: someone starting July 1st with 24 days gets ~12. Leave it empty for no proration.
- Holiday country — this person follows another country's public holidays (see the holidays guide).
- Language — the app and every email to them, in English, Italian, French or Spanish.
Contact
An optional HR record: job title, payroll ID, phone, address and an emergency contact. Every field is optional — the product works fine without them — and they're visible to admins only. They're included in the person's GDPR export and wiped by erasure, like everything else.
Absences
- Allowance — their annual days for allowance-deducting types, in half-day steps.
- Per-type counters — for types that don't deduct from the allowance (sick days, remote…), set an optional yearly cap per person; blank means unlimited.
- Adjustments: add or remove days for the current leave year with a reason: a bonus, a carry-over granted by hand, a correction, or the balance migrated from a previous tool. Each one is listed with its reason and date, feeds the effective allowance everywhere, and can be removed. Open Adjust the allowance under the form to manage them.
- Personal working week — for part-timers and anyone off the company schedule: pick the days this person works, and their leave is only counted on those days. Nothing selected means the company working week applies.
When someone leaves
Two different tools at the bottom of the person modal, for two different needs:
- Deactivate — the everyday action. They can't sign in anymore and disappear from the wall chart and approval queues, but their history stays intact for reports and audit. Their email address is released immediately, so the same address can be invited again later — handy for rehires or a fresh start.
- Erase (GDPR) — the right-to-erasure tool: identity, notes and sessions are irreversibly anonymized; only anonymous leave statistics remain. Use it on request, after any legal retention needs are met.
Also there: Export data (that person's data as JSON, for access/portability requests) and Reset two-factor (when someone loses their phone — see the security guide).
Reporting line
The Profile tab also has a Reports to field: the person's manager on the org chart. It is independent from the approver (who decides their leave), nobody can report to themselves, and loops are refused. The first org chart you generate drafts it for everyone from their effective approver.
Can't find what you're looking for?
Write to us: a human replies within 48 hours.
Contact us